ASPNetSpell can be downloaded from www.aspnetspell.com as a zip file.
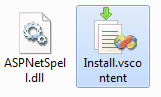
When you have downloaded the package, unzip it to a convenient location on your hard disk for future use.
There are 2 main sets of files that you have downloaded:
Visual Studio 2005 / 2008 / 2010
Alternative Installation Method for Visual Studio 2000, 2003, 2005 / 2008 / 2010 / 2012
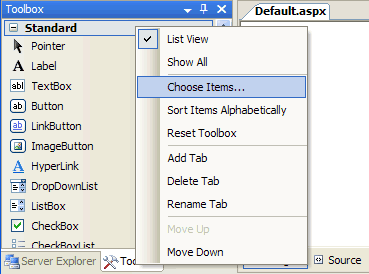
Right click on the Visual Studio ToolBox and pick "Choose Items...". In the new dialog, click "Browse...", then pick the AspNetSpell.dll which you downloaded and click "OK". You now have drag-and-drop access to AspNetSpell for web application development.
ASP.Net Runtime Versions
ASPNetSpell.dll comes in 3 different versions for dfferent ASP.net runtime. Make sure to download the right one.
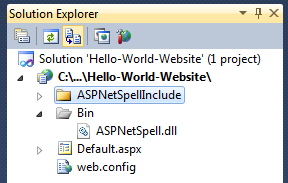
After dragging the AspNetSpell component onto a web form, you must copy the downloaded directory AspNetSpellInclude into the root folder of your website. If this location is inconvenient, you can specify another URL for the files using the InstallationPath property.
The best way to do this is to drag-and-drop the folder into your Solution Explorer from Windows.
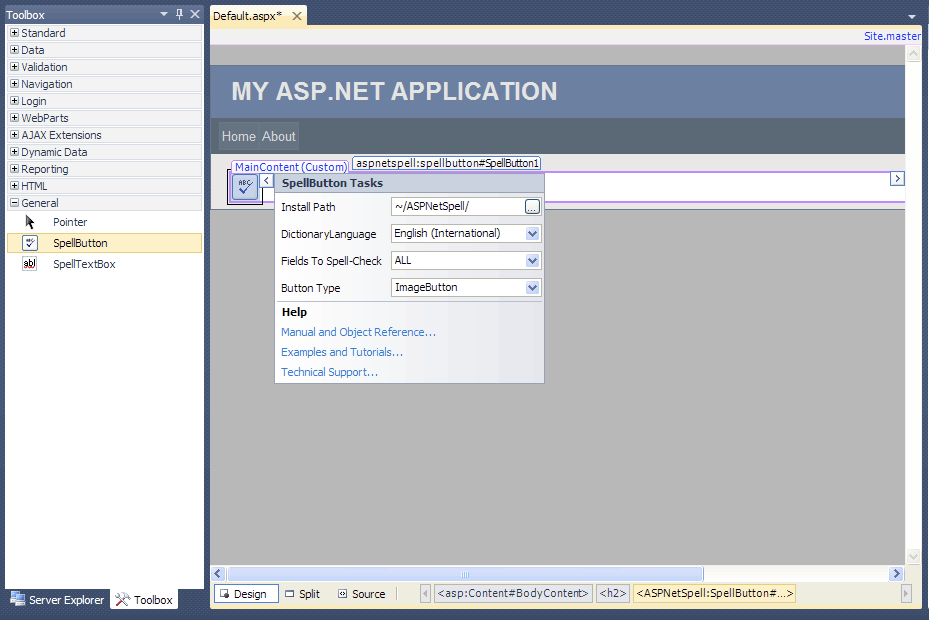
Once you have installed the ASPNetSpellInclude directory properly, you are ready to start spell checking. Just Drag the SpellButton into your webs form.
To select the field(s) that ASPNetSpell will spell check, change the FieldsToSpellCheck property. By default it will spell check every viable field on the page.
If you see a red cross on the screen or are given warning messages - read the (Troubleshooting) guide.
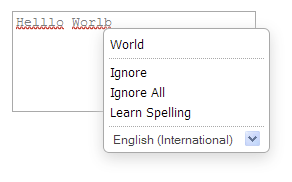
Drag the SpellTextBox into the web form in place of any normal multi-line TextBox. As you type spell checking is automatically provided.
The dictionary language which the spellchecker will use is set by the DictionaryLangauge property.
To install dictionaries - you must first download them from www.aspnetspell.com/Downloads.
The value of the Dictionary property should match the file name (excluding the .dic extension). Dictionaries include:
English (International) - Default Pre-Installed English (USA) English (Australia) English (UK) English(Canada) Dansk - Danish Nederlands - Dutch & Flemish Deutsch - German Francais - French Italiano - Italian Portuguese - Portugues - Brazil and Portugal Espanol - Spanish (Americas & Spain) Svenska - SwedishSpecialist Dictionaries
English (Medical) English (Legal) Engineering (Scientific)To use multiple dictionaries you can use a comma Separated list. E.g. : "English (Canada), Francais"
You can also encode you or dictionaries using the dictionary encoder.
In addition, you can add words to the list by putting them in the file ASPNetSpellInclude/Dictionaries/custom.txt . Put 1 word per line, preferably in alphabetical order for performance issues. This sorting can be achieved using software like MS Excel or EditPlus.
To change the language of spellchecker dialogs and buttons please see UserInterfaceLanguage property.